If you are new to Stanford Domains, please review Getting Started as a New User to Stanford Domains.
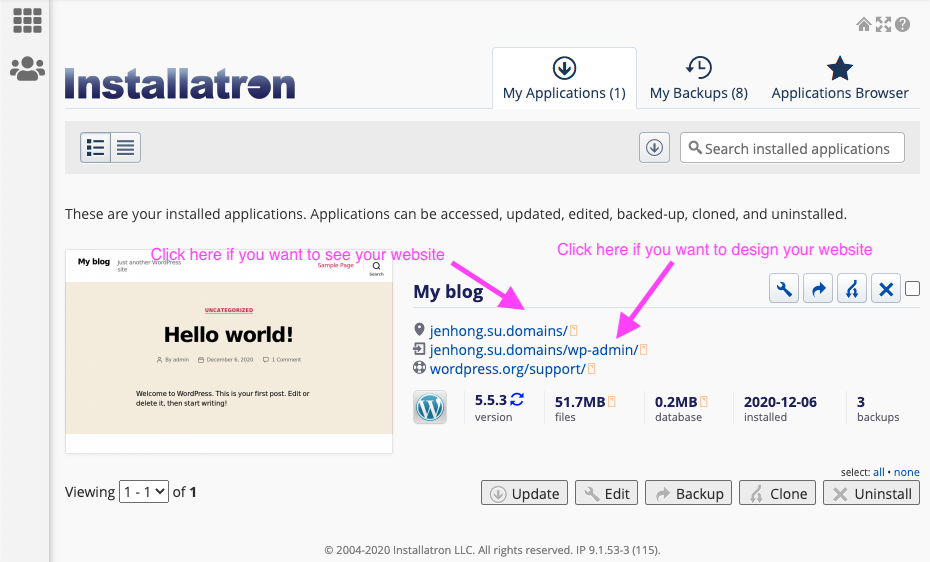
After you obtain a domain on Stanford Domains, you can install WordPress. Here are step-by-step directions for installing WordPress on Stanford Domains.
Step 1:
Log in to the Stanford Domains dashboard with your SunetID and password (Stanford SSO).
Step 2:
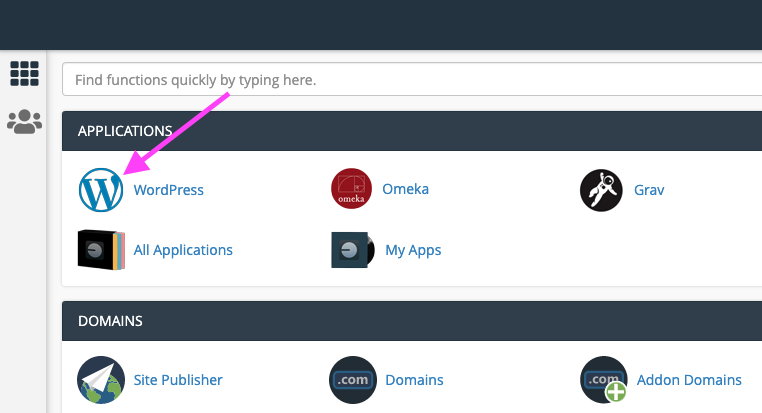
Select the WordPress Application.
Step 3:
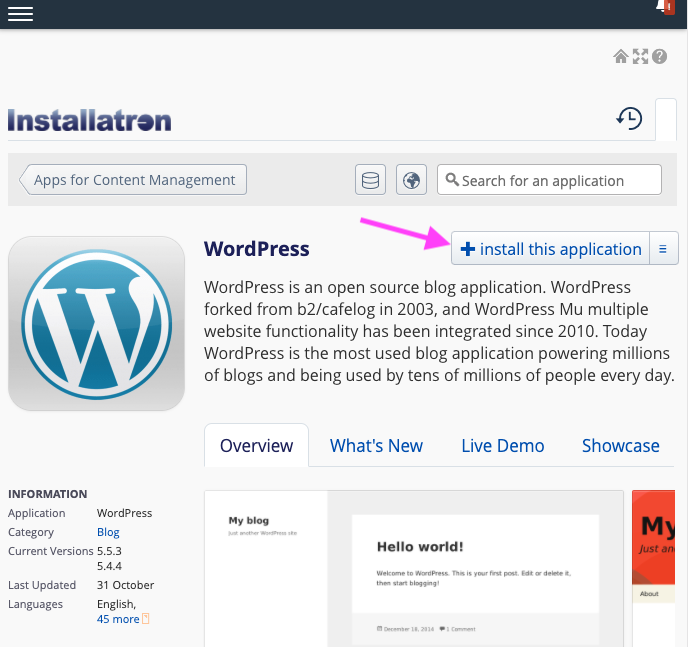
Click Install this application
Step 4:
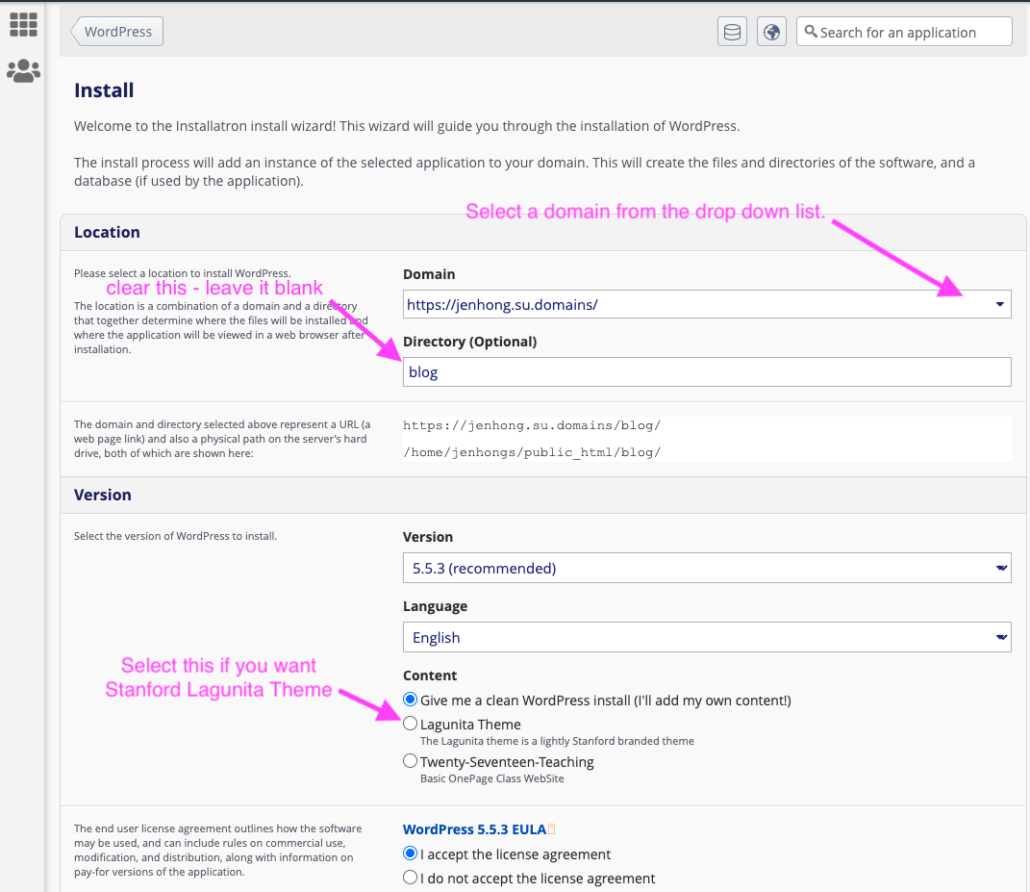
Select the domain name for this website. If you have multiple domains, you can select it from the drop down list. Making sure you leave the Directory blank, and select https://yourdomain.
Step 5:
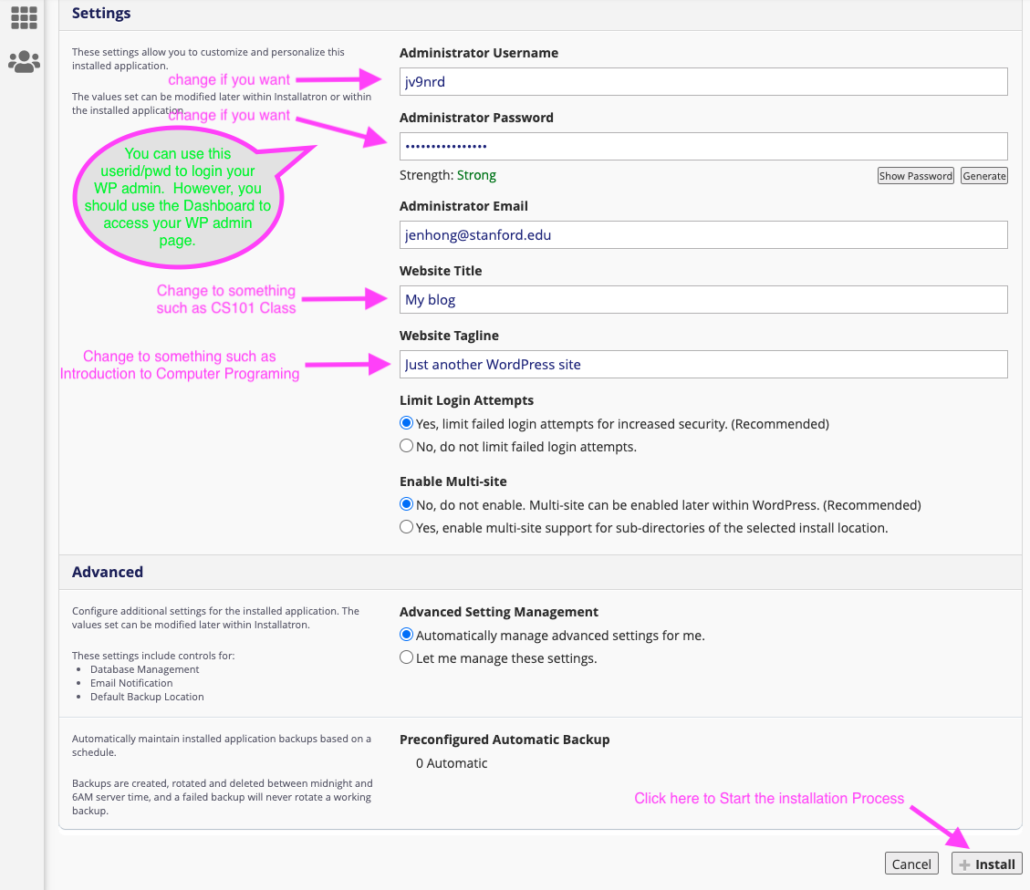
Settings – By default, the administrator username and Password are generated for you. However, you can change to anything you want. When setting the password, you should create a password with at least 16 characters for security reason. Note that you don’t really need this username/password to manage your website. We encourage you to manage your website by login to the Stanford Domain’s dashboard with your Stanford SunetID credential (SSO).
Step 6:
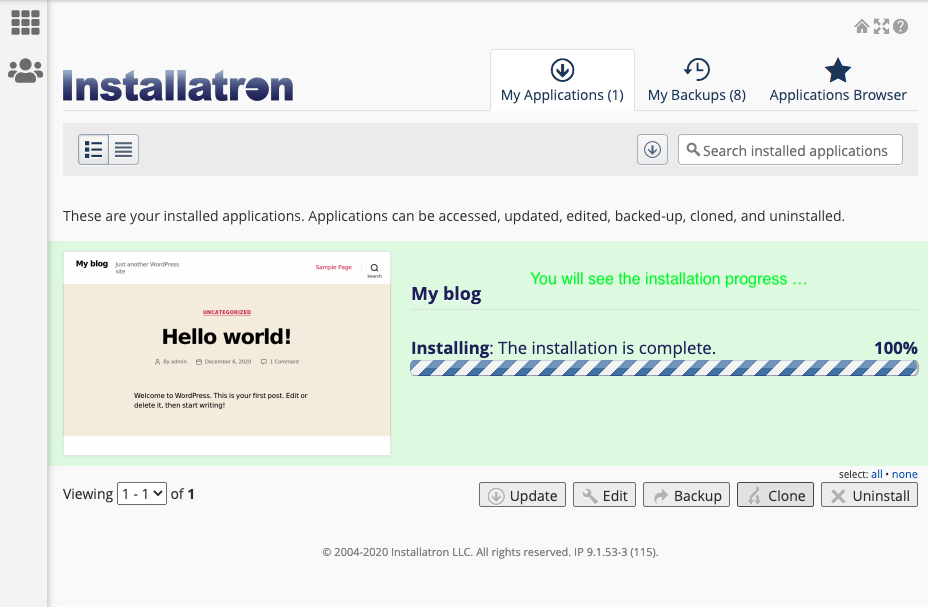
Installation progress – The installation should take no more than a minute.